I hate — HATE — making mistakes. Failure? Nope. Not happening.
I’m not perfect, but I *am* a perfectionist. (There’s a difference, right?) I love the idea of continuous improvement. I’m very self-critical, but I also seek out feedback constantly, whether it’s at work, at the gym (where I teach group fitness), or in the kitchen. It’s nice to know what I’m doing well — we all want and need positive feedback — but I’m much more interested in whats not working and how I can do better.
When cooking, I especially love trying dishes that involve a new skill, technique, or ingredient. I embrace the learning process, and I never expect anything to turn out perfectly the first time. Hopefully, it’s edible, and in the second batch, I’ll have ironed out any kinks.
At least, that’s the usual plan.

Enter: Salted caramel sauce. I’ve worked with boiling sugar before, including to make marshmallows, fudge, and other candy. I needed salted caramel sauce for a recipe, and it seemed like I could easily knock it out on a weeknight. No big deal.
Oh, but it was. I tried different pots of different size and material. I tried different temperatures. I tried using a candy thermometer and I tried winging it. I made thick black goo, crunchy brown brittle, crunchy golden brittle, and the most delicious chewy caramels ever (which I couldn’t even tell you how to replicate).
Four batches, four failures.
FOUR!?!? I never screw up FOUR times!
At this point, I was fuming, but it was late and I was out of both ingredients and patience. Ego bruised, I walked away.
Two weeks later, I was perusing the latest issue of Bon Appetit, and happened to notice that one of the recipes included a salted caramel sauce. I compared the ingredients and a special technique primer. What I learned is that many recipes for caramel, including the one I was using, are not forgiving; they require precise equipment, temperature and timing. One misstep, and you’ll either burn the sugar (see: thick black goo), or crystallize the sugar (see: brittle).
“For a smooth, anxiety-free caramel, every time,” BA recommends adding cream of tartar, which is acidic and stabilizes the sugar.
Sweet, salty victory.

Once the sugar dissolves, put the spatula away until it begins to caramelize.

The mixture progresses from honey to amber very quickly. Watch it carefully.

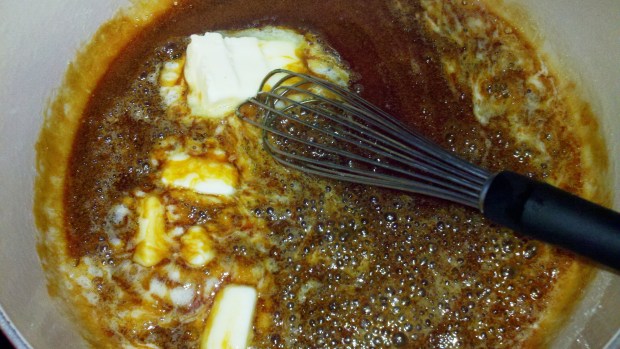
Turn off the heat and carefully stir in the butter. The mixture will get very bubbly.
Salted Caramel Sauce
Adapted from Bon Appetit
Yield: about 1 1/4 cups
1 cup sugar
1/8 tsp cream of tartar
3 Tbs water
1/4 cup unsalted butter, cut into pieces
1/2 cup heavy cream
1 tsp kosher salt
Choose a heavy-bottomed saucepan with high sides, as the mixture will bubble up. Whisk together sugar, cream of tartar, and water. Bring to a boil over medium-high heat. As the mixture comes to a boil, the sugar will dissolve. Stir once with a heatproof spatula.
Keep watch as the mixture boils, but do not stir. Once you see it start to caramelize in spots, stir again to ensure even caramelization. When the mixture is the color of honey (about 10 minutes), lower the heat to medium-low, to give yourself more control. When the color reaches a deep amber color (about 5 minutes more), turn off the heat.
Note: cooking times can vary considerably. Stay close and judge with your eyes, not the clock.Remove caramel from heat. Carefully whisk in butter (mixture will bubble vigorously), then whisk in cream and salt. Let cool slightly in pan, then pour into a heat-proof bowl or jar.