Month: August 2013

Sticky Fig Jam

???????????????????????????????

This should be a picture of an embarrassingly large picnic spread. I’m not talking Americana cold fried chicken and potato salad and pie picnic food (although I do love me some pie).

I’m talking prosciutto, salami, several cheeses, crusty bread, crackers, marinated vegetables, maybe some aged balsamic vinegar and good olive oil, and of course, more wine than you know you should have but don’t really care.

Just when you think you’ve perfected that picnic spread, fig jam walks in and blows your mind.

Game. Over. It’s that good.

IMG_2984

Fig jam is like strawberry’s sexy, more sophisticated older sister. Jam is also seriously easy, and is a great project for a novice canner if you’re so inclined. If not, you can refrigerate unprocessed jam for a few weeks.

???????????????????????????????

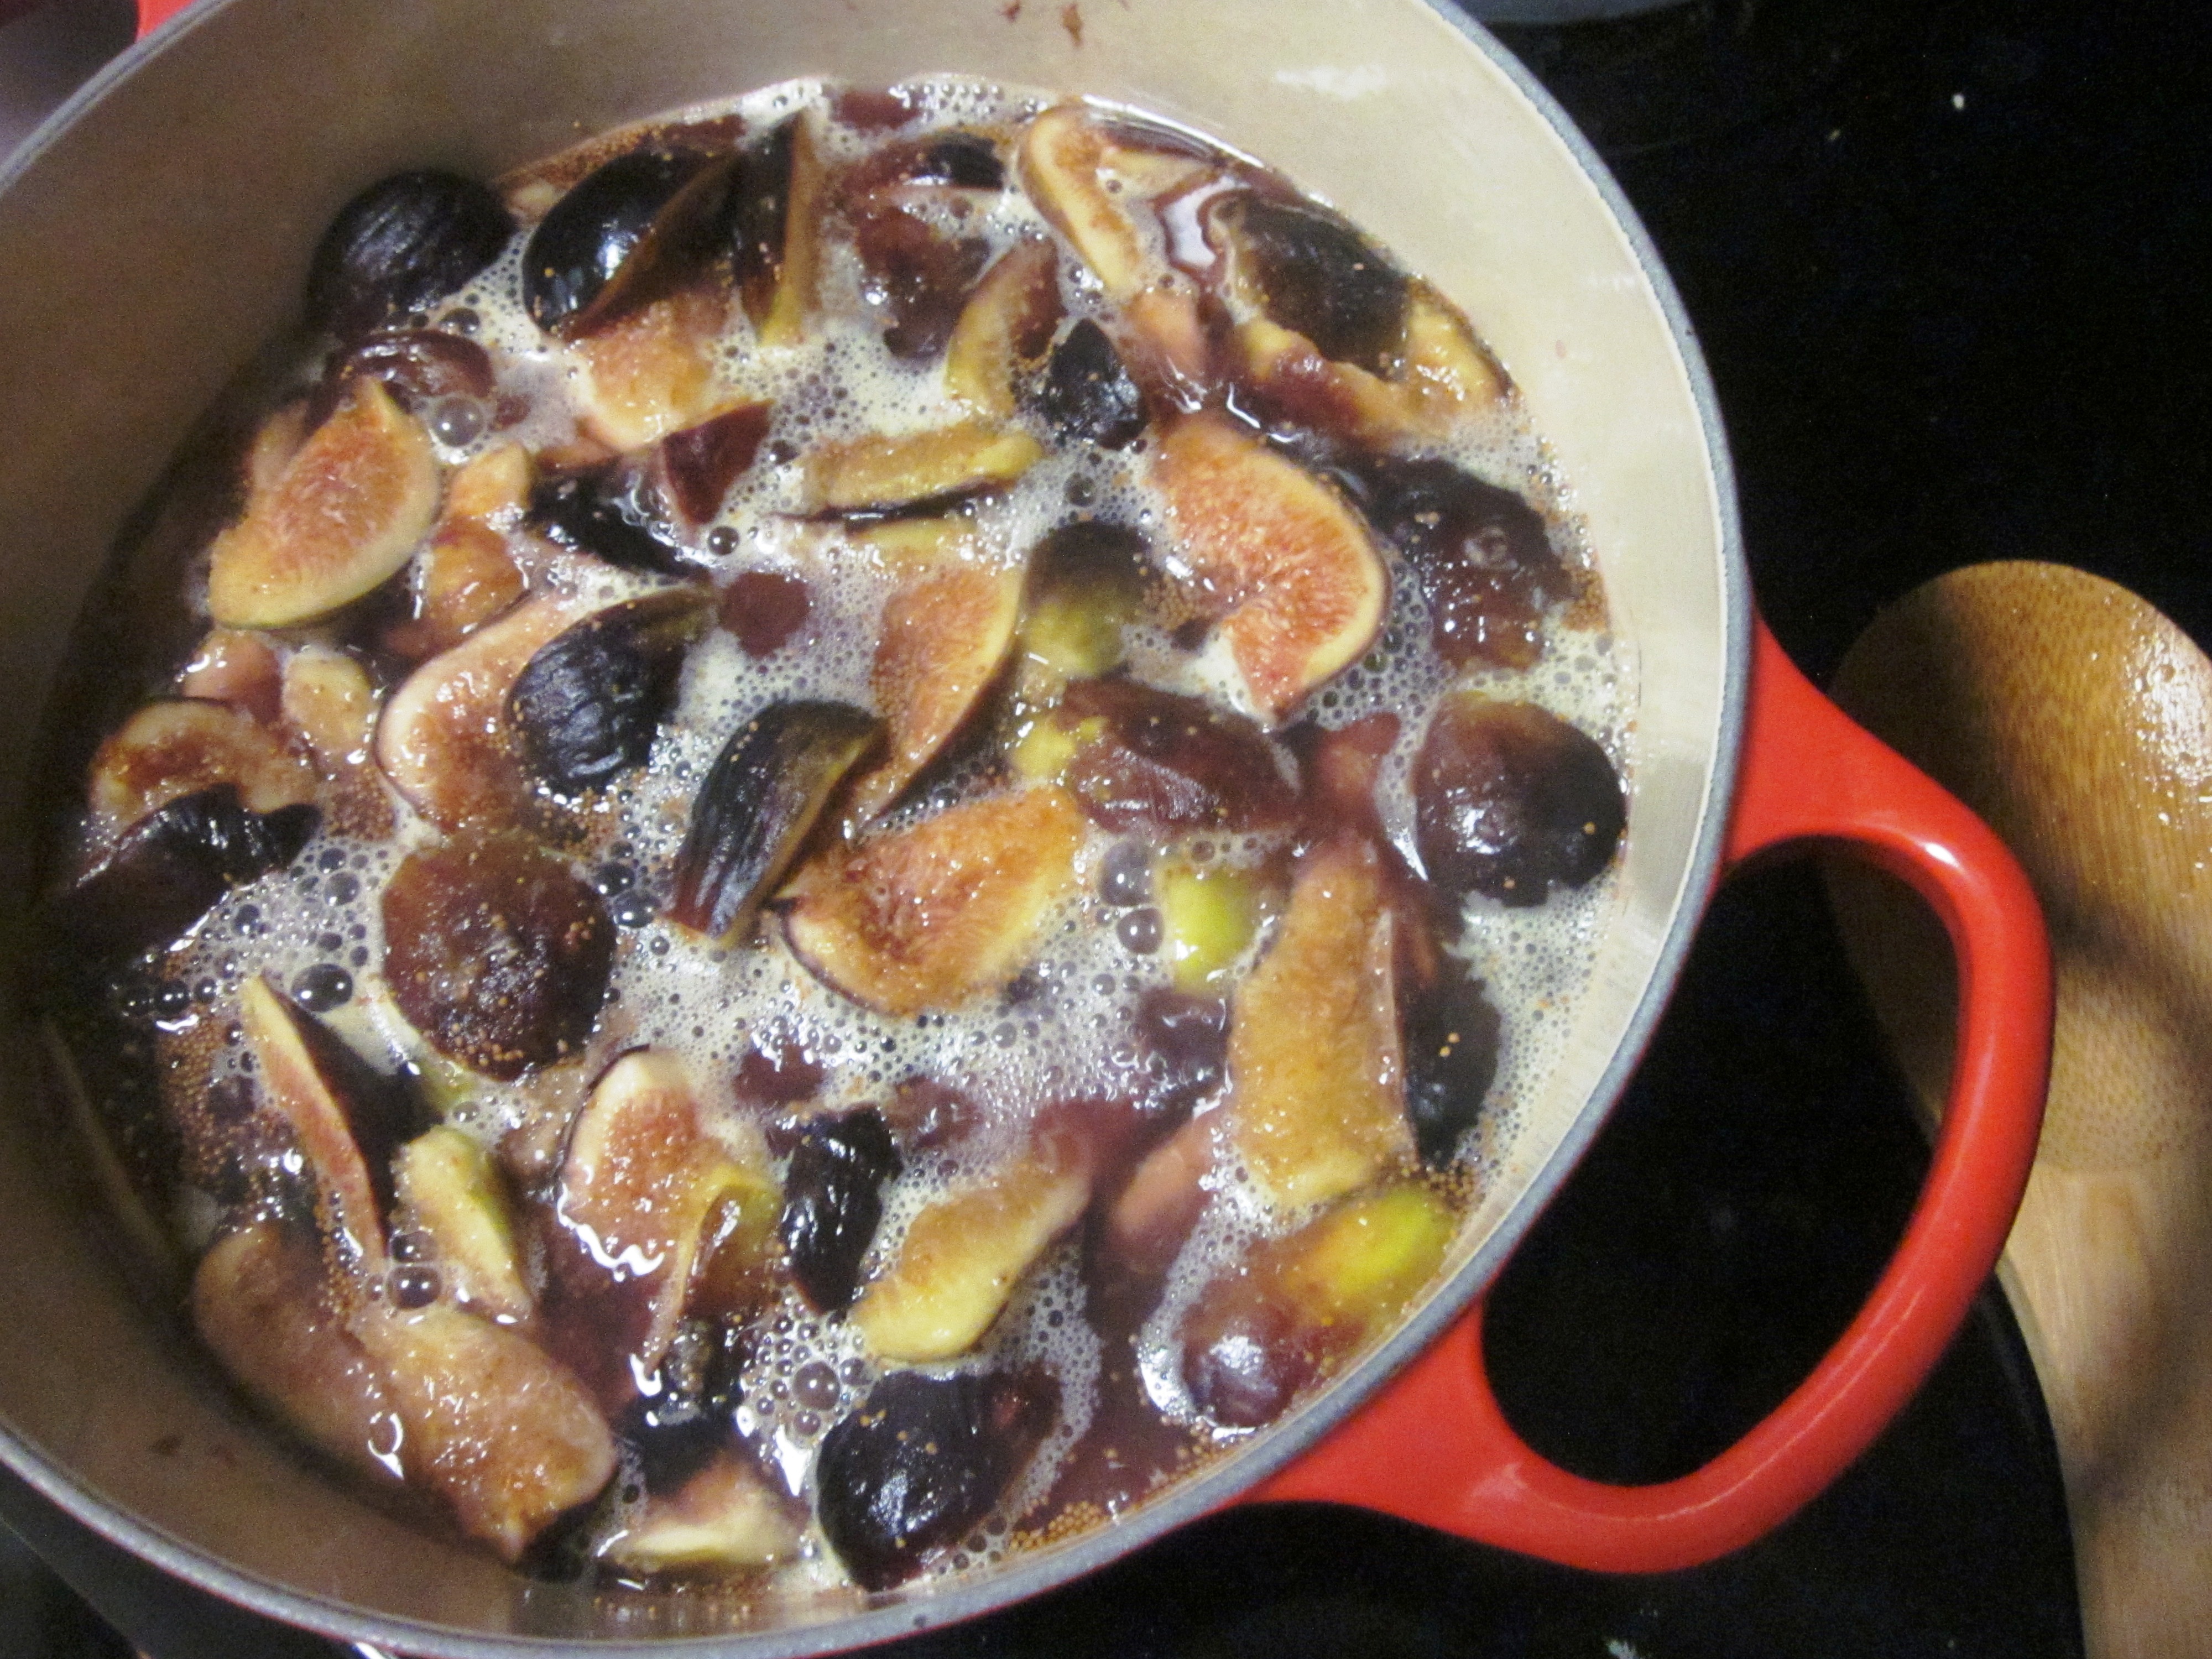
Fig season is fleeting, but if you’re lucky enough to get your hands on some this recipe should definitely be on your must-do list for the weekend. The beauty of jam is that you don’t need perfect fruit. If you’re canning, be sure to use bottled lemon juice, which has a more consistent acidity level (important for safe and effective canning).

???????????????????????????????

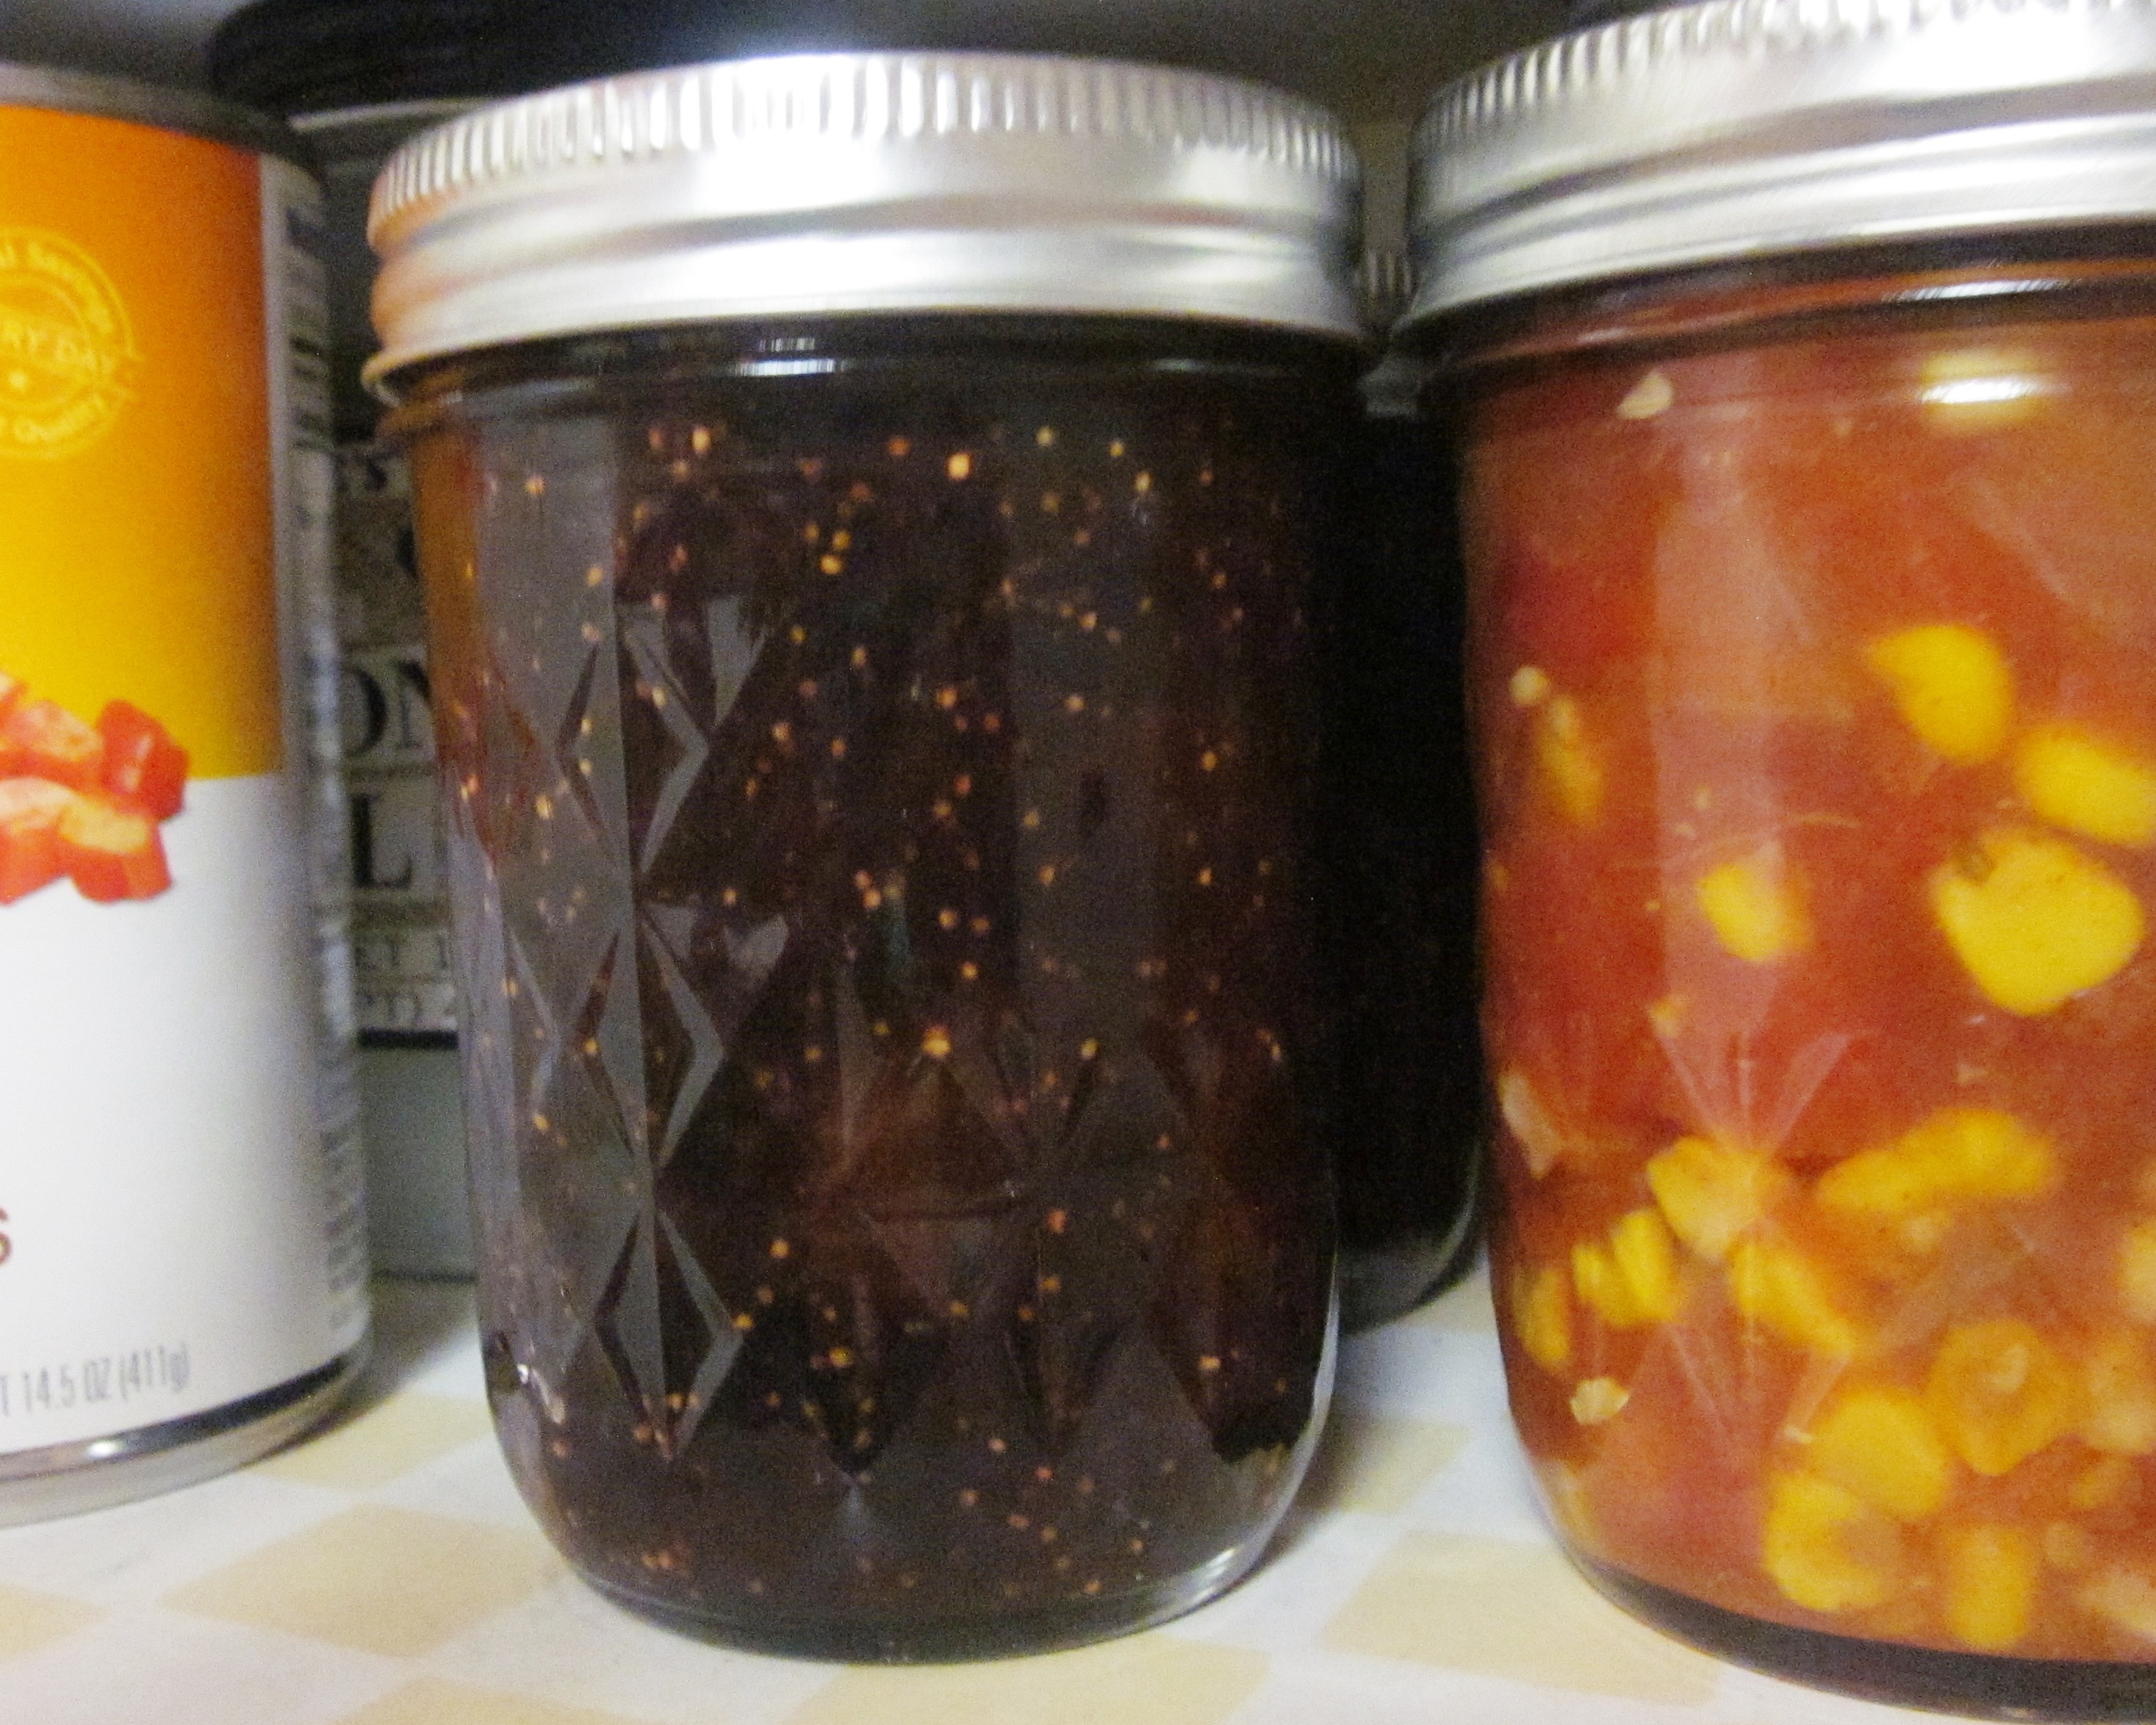
I’ll be sure to upload a picture just as soon as I have a worthy picnic spread. For now, you’re stuck with pictures of jars in my pantry. In the meantime, feel free to daydream your own picnic spread.

???????????????????????????????

Sticky Fig Jam

From Put ’em Up! cookbook, by Sherri Brooks Vinton

Makes about 4 cups

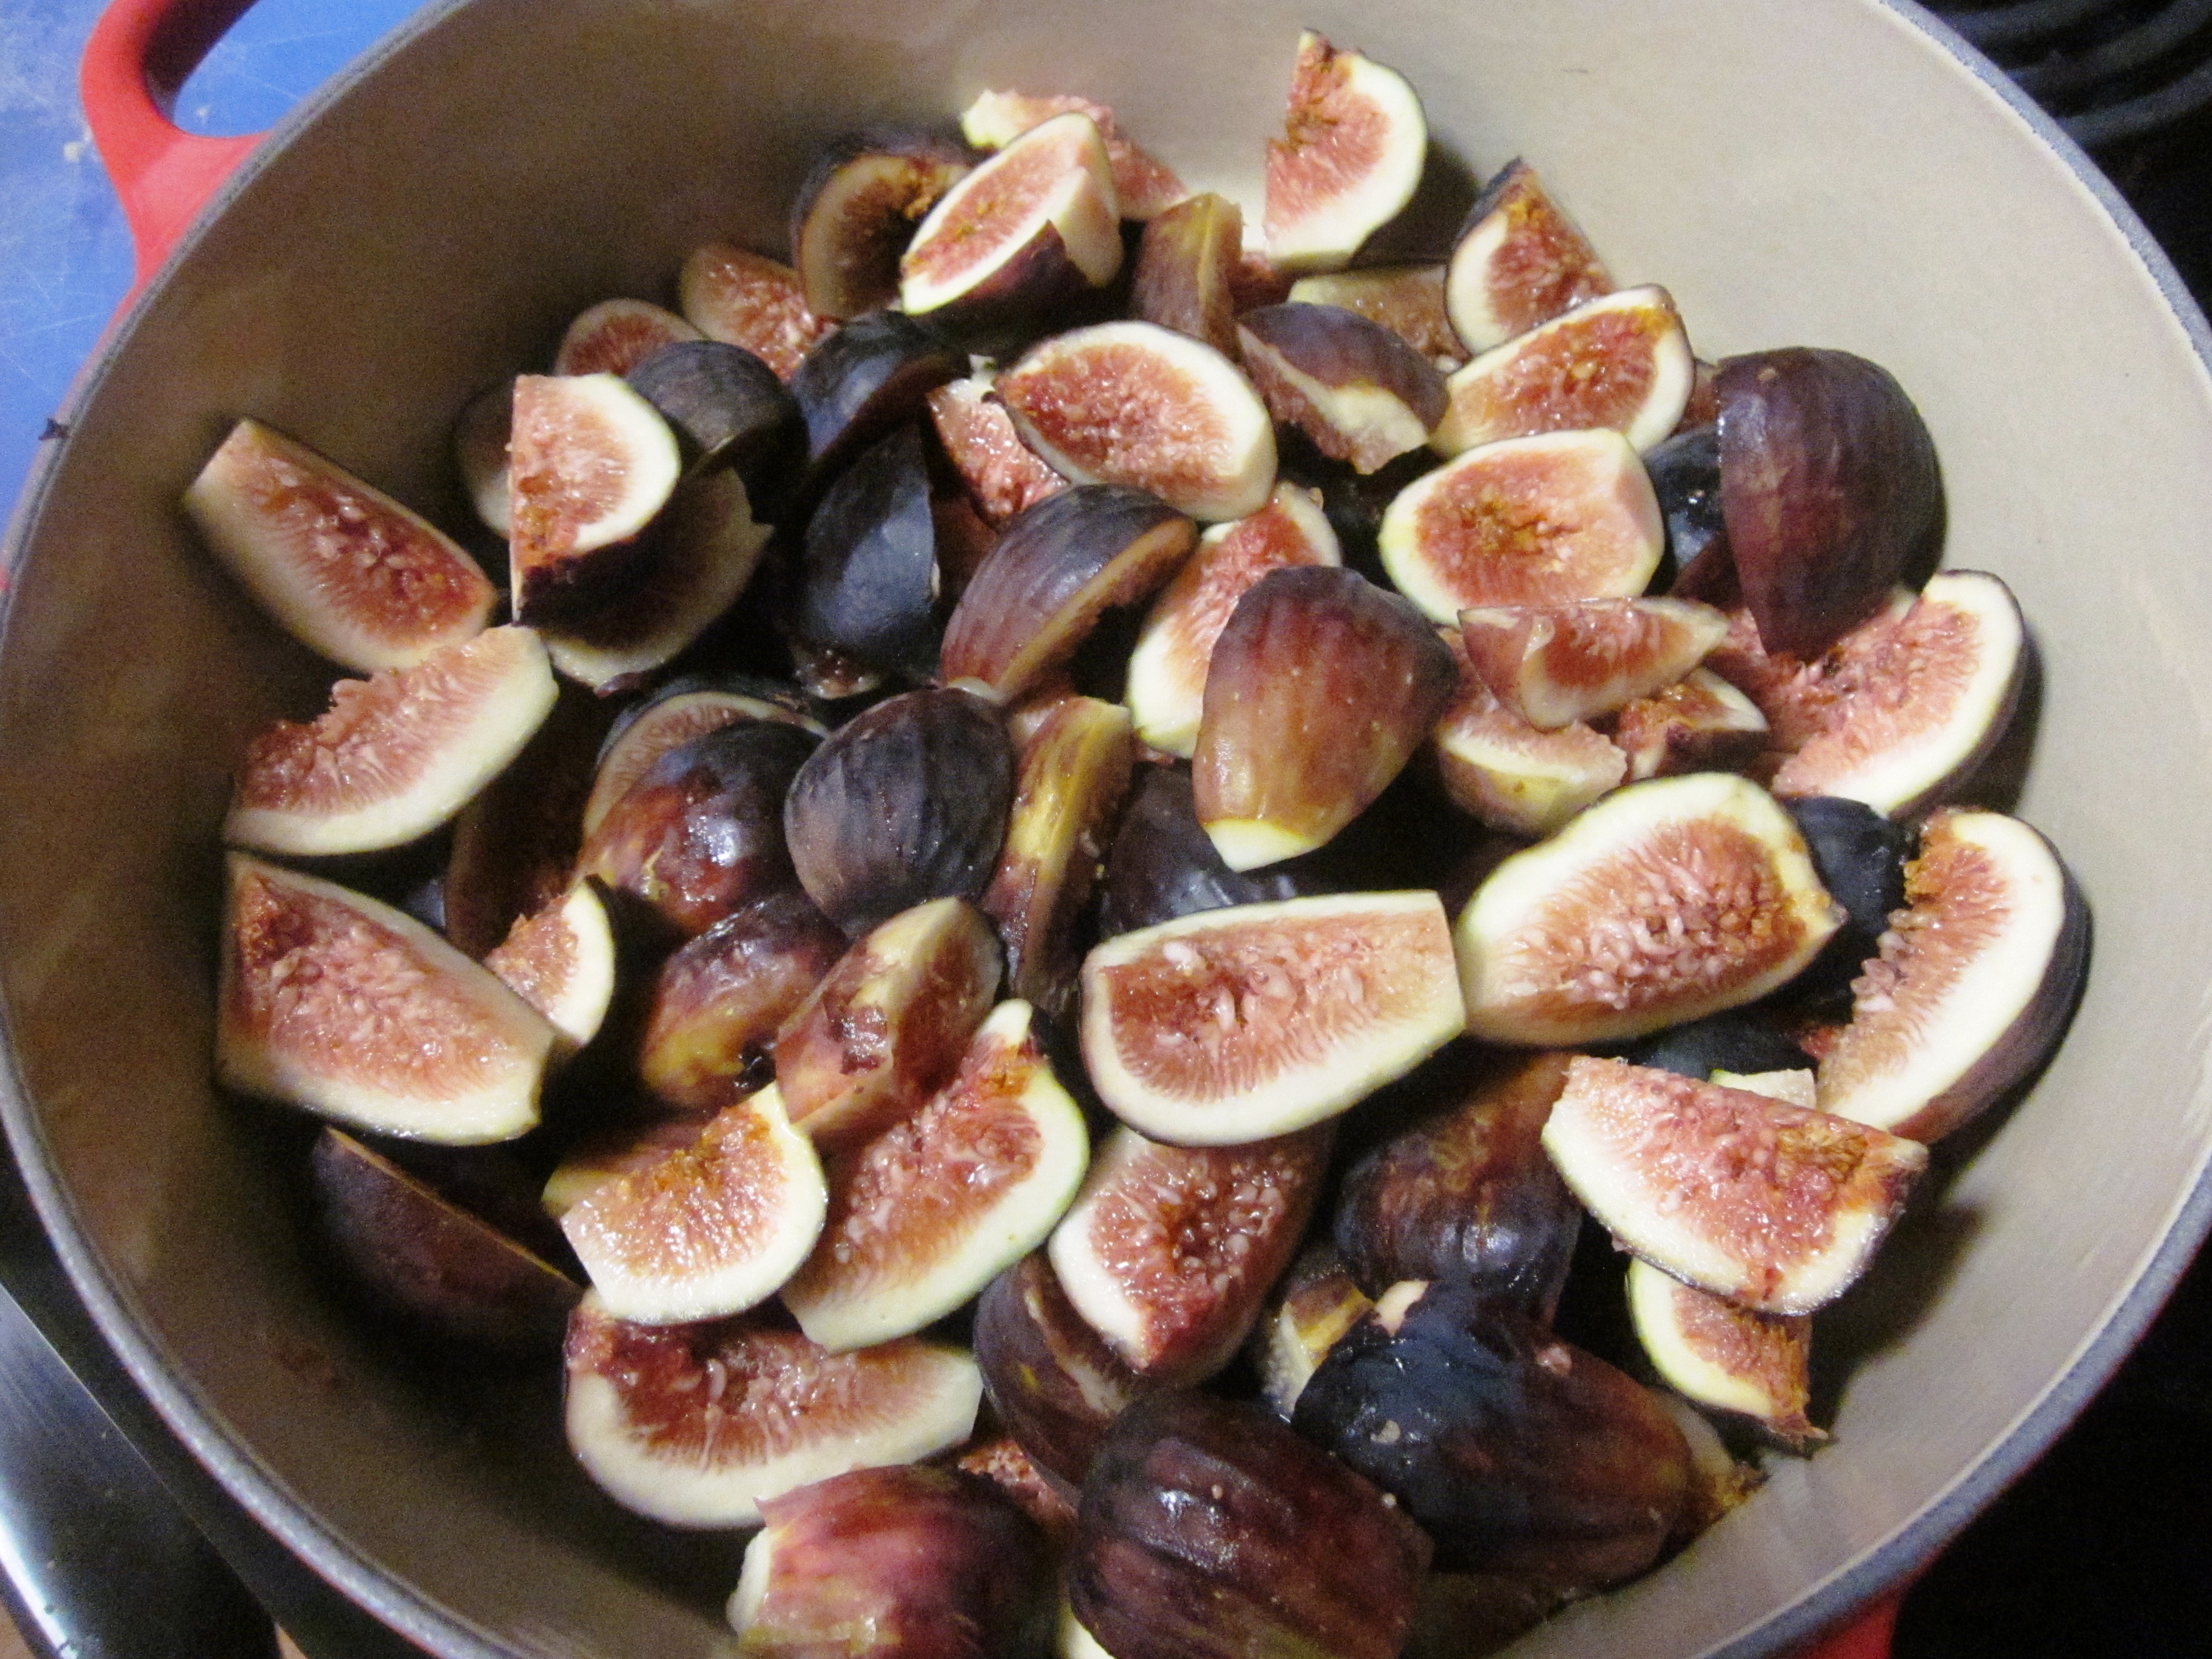
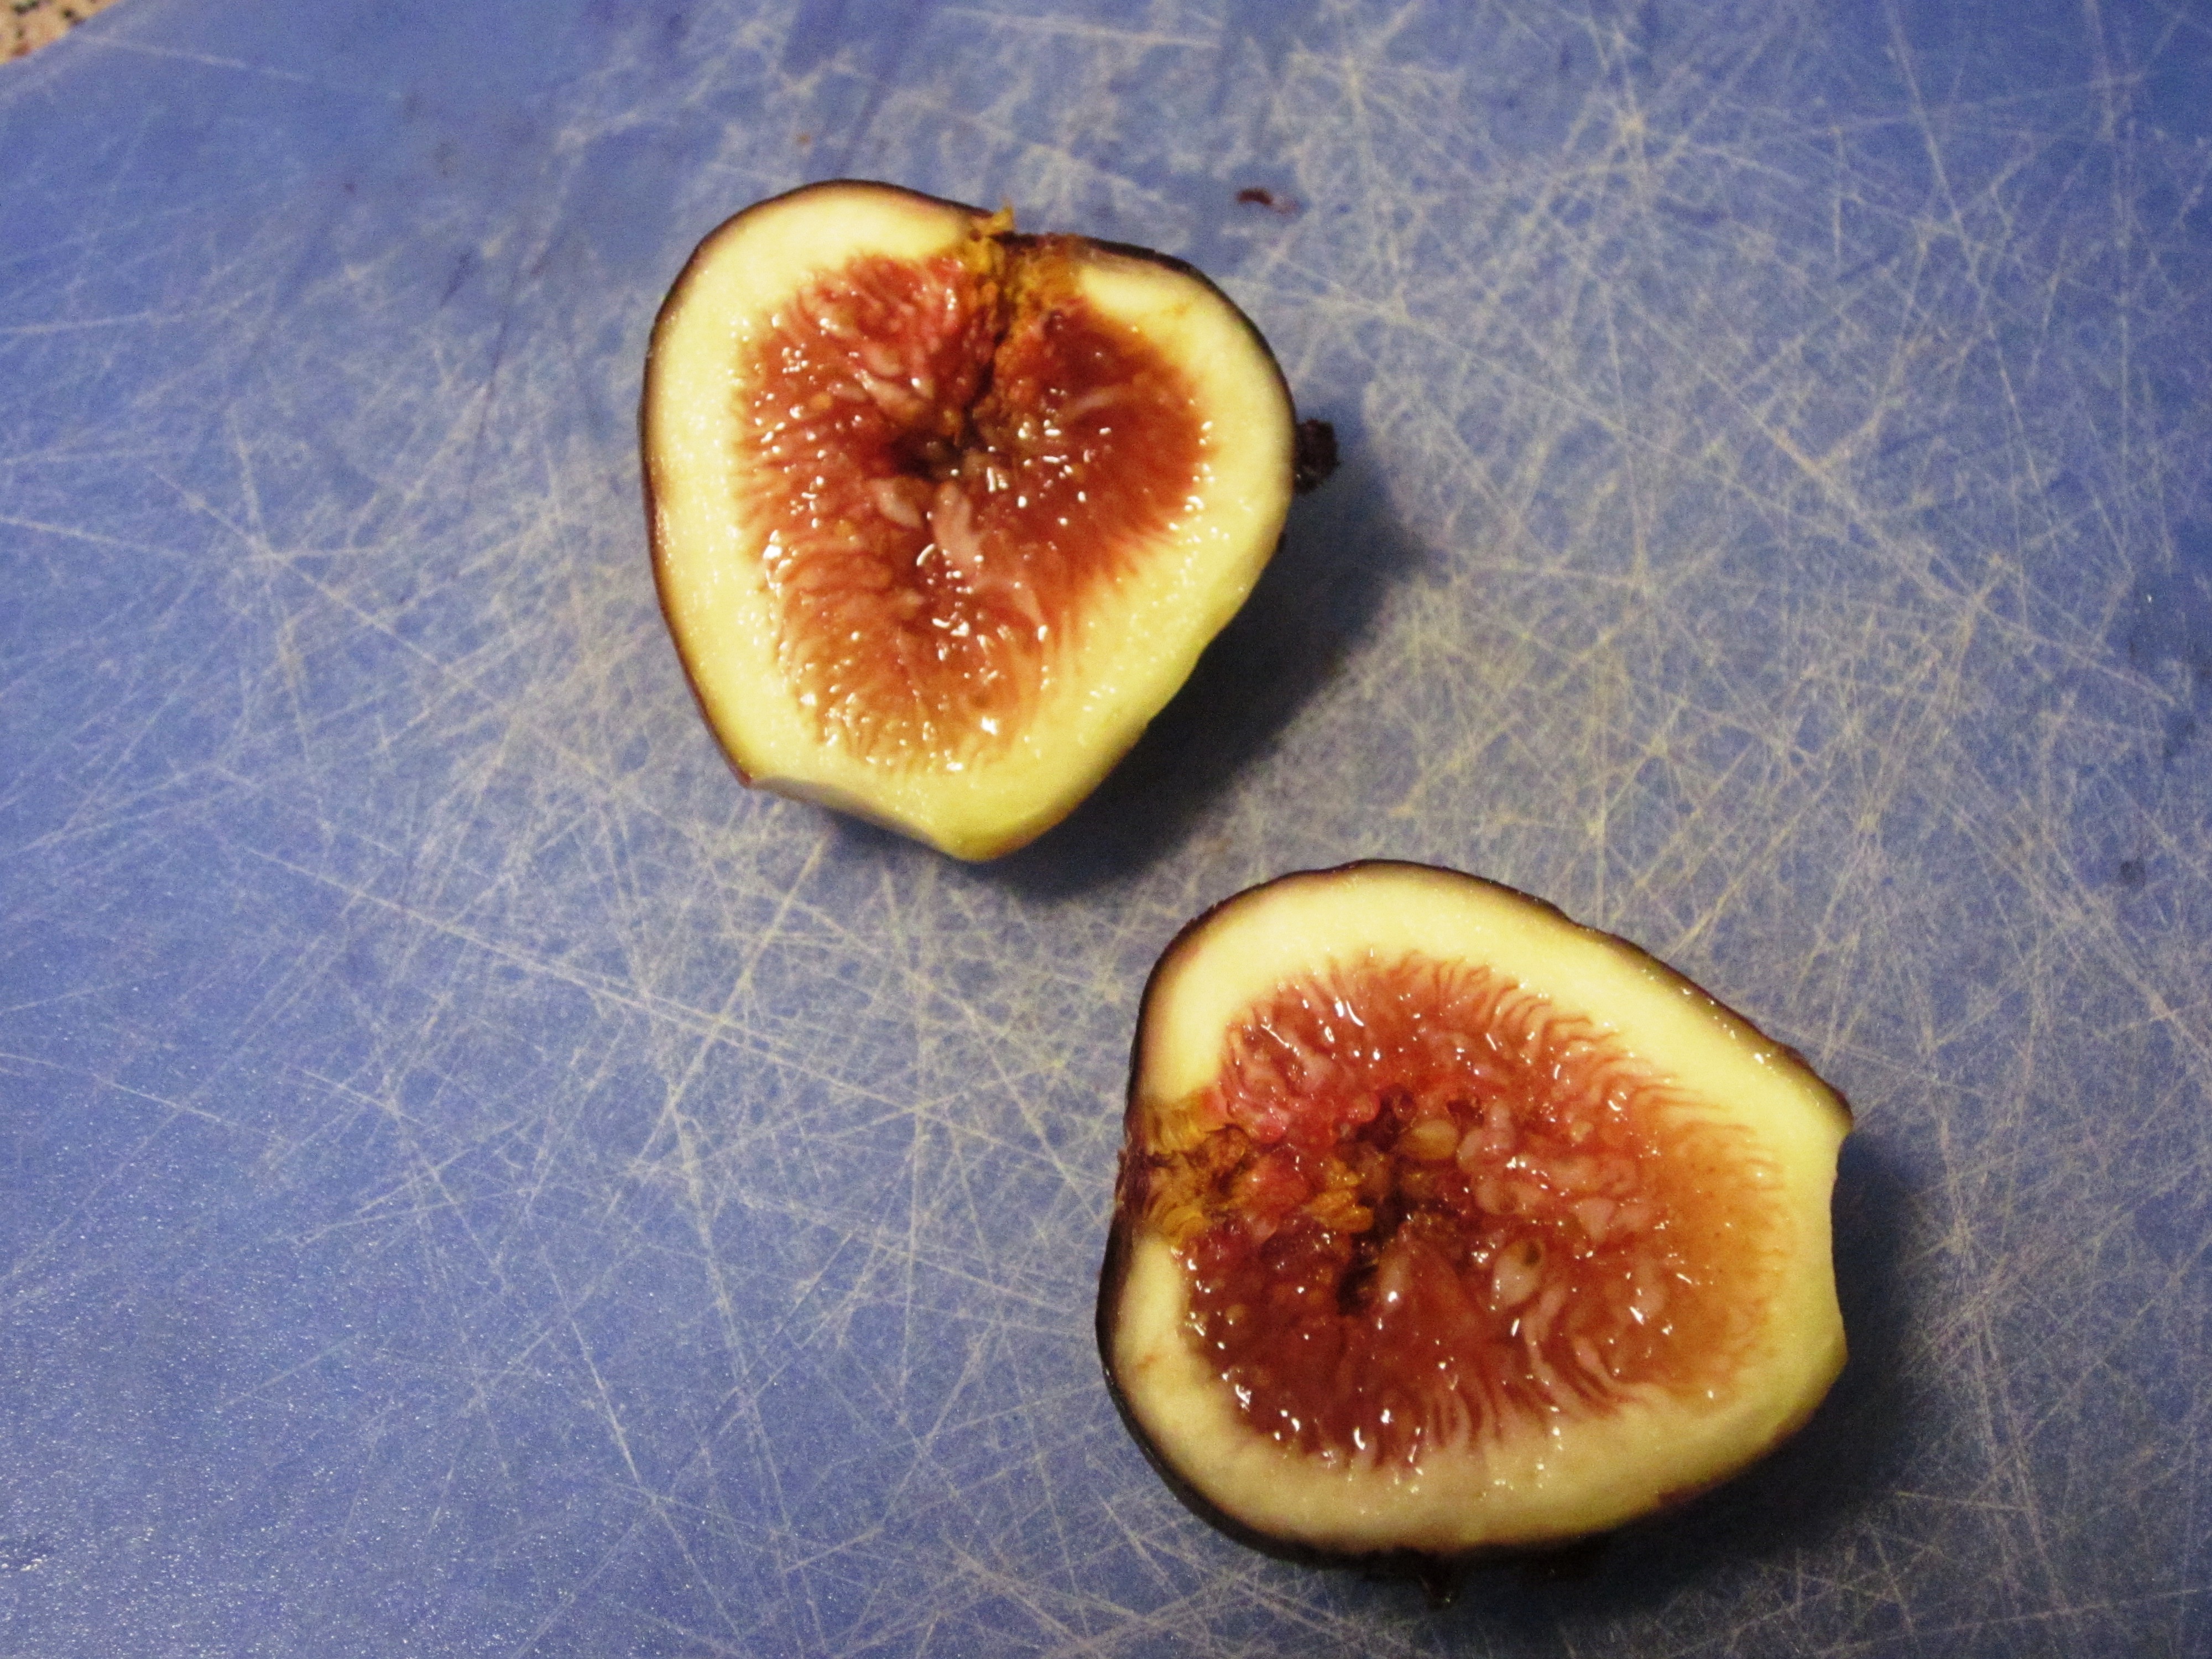
2 pounds figs, stemmed and quartered (I used black mission figs)
1 cup water
1 cup sugar
1/2 cup balsamic vinegar
1/4 cup bottled lemon juice

Bring the figs and water to a boil in a large nonreactive pot. Reduce the heat and simmer for 5 minutes to soften the fruit. Crush the figs with a potato masher. Add sugar, vinegar, and lemon juice and return to a boil. Reduce the heat and simmer, stirring frequently, until thick and jammy but not dry, about 20 minutes. Test for gel (for a how-to, go here). Remove from the heat and set aside for 5 minutes, stirring to release air bubbles.

If not canning, ladle into bowls or jars. Cool, cover, and refrigerate for up to 3 weeks.

If canning, use the boiling-water method. Ladle into clean, hot 4-ounce or half-pint jars, leaving 1/4 inch of headspace. Release trapped air. Wipe the rims clean; center lids on the jars and screw on jar bands. Process for 10 minutes. Turn off heat, remove canner lid, and let jars rest in the water for 5 minutes. Remove jars and set aside for 24 hours. Check seals, then store in a cool, dark place for up to 1 year. If any jars did not seal, refrigerate immediately.

Fudge Pops

20130817_213201(1)

Does anybody else remember Jell-O Pops?

The 1980s were a good time to be a kid in small-town Nebraska — or at least, that’s how I remember them. I have so many food associations with the summers of my childhood: ordering 6 gummy worms for 25 cents — just the red and white ones, please! — after a t-ball game, entire meals comprised of sweet corn, sneaking candy into the city pool, baking for the county fair, grilling burgers. And of course, all the frozen treats: ice cream pops, popsicles, push-pops, drumsticks, ice cream sandwiches…

In summary, I ate a lot of sugar as a kid.

I don’t know why Jell-O pops stick out among so many brands and varieties of treats. In my family, we ate both the pudding pops (although I only remember chocolate, not vanilla or swirl that apparently existed) and fruit pops — strawberry, raspberry and orange. The chocolate ones always disappeared like gangbusters. Maybe that’s why my mom seemed to buy the fruit ones more often. Or maybe they just survived longer in our freezer.

When it came to Jell-O fruit pops my mom only liked strawberry (actually, that applies to her feelings about most fruit), and I liked both strawberry and raspberry, so she would get strawberry, I would get raspberry, and my brother would get orange. I have no idea whether my brother’s favorite was orange, or whether he even liked orange at all, or if anyone ever bothered to ask him. If he reads this post, I am sure he will add it to his litany of complaints about the injustices of being the youngest child. Life is hard.

???????????????????????????????

Anyway, a couple years ago some friends gave me an instant ice pop maker and “cookbook” (is it a cookbook if there’s no cooking?) for my birthday.  I don’t use the maker often enough, but one of my favorite recipes is for classic fudge pops, not the least of which is because I associate them with summer. And I don’t know about you, but I needed a little reminder of what late summer is actually supposed to look and feel like.

They’re really rich, yet I had no interest in sharing. I’m like that with chocolate. Welcome back to the 80s, and have a happy Labor Day.

???????????????????????????????

Classic Fudge Pops

From Ice Pops, by Shelly Kaldunski

Makes 6-9 popsicles

1 3/4 cups Half & Half
1 tablespoon unsweetened cocoa powder
2 tablespoons malted milk powder*
1 tablespoon light corn syrup*
1/2 teaspoon vanilla extract or vanilla bean paste
Pinch of salt
4 oz. semisweet chocolate, chopped (or use semisweet chocolate chips)

Special equipment: ice pop molds or an instant ice pop maker

*RHRW note: Malted milk powder is usually found in the grocery store near hot cocoa and powdered milk mixes and coffee add-ins. You might also find it with ice cream toppings. If using an instant ice pop maker, do not substitute an artificial sweetener (the pops will stick). I have not tried it, but honey or sugar should work as a substitute if desired.

In a saucepan, combine the Half & Half, cocoa powder, malted milk, corn syrup, vanilla, and salt. Bring to a simmer over medium-high heat, stirring occasionally, and cook until the cocoa and milk powder have completely dissolved. Remove the mixture from the heat and add chocolate. Stir until the chocolate has completed melted. Chill in the refrigerator until room temperature. (RHRW note: if using an instant ice pop maker, I recommend chilling the mix much cooler than room temperature for best results. For the smoothest popsicle texture, strain your liquid through a fine mesh sieve to remove any unmelted specks of chocolate.)

If using conventional ice pop molds, divide mixture among molds. Cover and freeze until solid, at least 4 hours or up to 3 days. If using sticks, insert when the pops are partially frozen, after about 1 hour.

If using an instant ice pop maker, follow the manufacturer’s instructions. If you aren’t serving the pops right away, layer on parchment paper in the freezer.

Chicken and Peaches Platter

Rotisserie chicken is a great gift to a busy cook (or non-cook). It is flavorful, fall-off-the-bone tender, and a versatile protein source. The best part? It is very economical: at my neighborhood grocery store, a chicken goes for $7.50 during the week and just $5 on Sundays. Roasting thr chicken yourself isn’t pricey, but I don’t think I can beat that deal.

image

Whether from-scratch or rotisserie, I love having a chicken on Sundays and portioning out several lunches that won’t leave me bored or headed for takeout. I picked up a few fresh local peaches and put together a killer salad.

Rotisserie meet can sometimes feel a little greasy to me (compared to a chicken I’ve roasted myself). I discard the skin and am a little more vigilant on trimming excess fat and skimp a little more on the dressing; the meat is so moist you won’t miss it.

Chicken and Peaches Platter
Serves 6

2-3 heads romaine lettuce, cut crosswise into 1-inch strips (you want at least 12 cups)
1 rotisserie chicken (about 2-2 1/2 lbs), skin discarded, meat removed from bones and chopped in large pieces
3 peaches, sliced (peeled if desired)
6 tablespoons crumbled blue cheese 1/2 cup almonds, roughly chopped
1/4 cup white wine vinegar (or try sherry, champagne, raspberry or your favorite vinegar)
1/4 cup (or less) extra-virgin olive oil
1 teaspoon Kosher salt
1/4 teaspoon black pepper

Arrange the lettuce, chicken, peaches, cheese, and almonds on a platter. In a small bowl, whisk together the vinegar, oil, salt, and pepper. Drizzle over the salad when ready to serve.