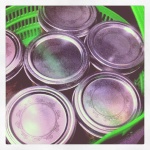
 Although I grew up baking and cooking, and watching both my grandmother and mother canning everything from beans to tomatoes, I’d never attempted canning until last summer. Ball sells a great starter kit and accompanying tool kit for the canning novice (I’ve also seen them at Walmart and Target during the peak summer months). My first adventure in canning was blackberry preserves, and I was in love.
This summer, I decided to be a bit more adventurous. When I got my hands on some great corn and tomatoes, I knew the perfect follow-up: corn salsa.
The bright colors and flavors make a great addition to any Mexican spread, an accompaniment for grilled summer steak, chicken breast or vegetables, or my personal favorite: scooped straight out of the jar with tortilla chips.
Canning is optional, and the salsa will keep up to three weeks without it — although as fast as I’ve watched my friends devour this stuff, I don’t think you’ll need to worry about it going bad. The flavors will be even better the day after it’s made.
- Corn and tomato complement one another in this fresh summer salsa
- Small-batch canning is an excellent way to preserve seasonal produce
- Sealed jars keep in the pantry for up to one year
Corn Salsa
From Put ’em Up, by Sherri Brooks Vinton
Yield: about 8 pints (Note: I cut the recipe in half)
12 ears corn, shucked
3 cups distilled white vinegar
1 c sugar
1 T ground cumin
1 T salt
5 lb tomatoes, diced
1-2 jalapenos, diced, seeds removed (leave the seeds for a spicy salsa)
1 green bell pepper, diced
1 large onion, diced
2 garlic gloves, mincd
1/2 c chopped fresh cilantro
Bring a large nonreactive stockpot of water to a boil. Add the corn and boil for 4 minutes. Drain. When the corn is cool enough to handle, stand the cobs on end and slice vertically to cut off the kernels, being careful not to cut into the cobs. (I use an electric knife.) Empty and wipe out the stockpot.
Combine the vinegar, sugar, cumin, and salt int he stockpot, and bring to a boil. Add tomatoes, jalapenos, bell pepper, onion, garlic, and corn kernels. Return to a boil. Reduce heat and simmer for 5 minutes, allowing flavors to blend. Stir in the cilantro and return to a boil. Remove from the heat.
If refrigerating, ladle into bowls or jars. Cool, cover and refrigerate for up to 3 weeks.
If canning, use boiling water method. Ladle into hot half-pint or pint canning jars, leaving 1/2 inch head space. Release trapped air. Wipe rims clean; center lids on jars on screw on jar bands. Process for 15 minutes. Turn off heat, remove canner lid, and let jars rest in water for 5 minutes. Remove jars and set aside for 24 hours. Check seals, then store in a cool, dark place for up to 1 year.


